So, my first 'proper' blog post begins with another first! My little boy turned a year old last month, and what better way to mark it than with an 'arrgh-some' pirate-themed party. I was SO excited, and immediately began planning costumes, decorations, party invitations and my biggest challenge - a homemade cake! My first stop for invitations was
Nitwit Collections - I love these guys! The designs are gorgeous and you can always guarantee a lovely finish when using the collections (plus Jeff and Mary Fran are super friendly!) As predicted, the
Land Ho collection was perfect for what I wanted so I downloaded Serif PagePlus and set about making my invitations.
As you can see, I was so excited about my design that I gave all the invitations out without actually taking any photos - something I will need to get better at for this blog. Duh. BUT, here at least is my design. I printed it onto lightweight cardstock which I then glued to an A6 kraft postcard. I also designed a map-themed reverse featuring the party venue details (which was actually my mum's house!). It set the tone perfectly!
My party bags featured the same Nitwits design, but I actually managed a photo this time - unfortunately AFTER the event, so the bag is all wrinkled and not in its former pristine glory, plus the photo is a bit rubbish too. I taped it shut with some funky craft tape, and inside it lurked some chocolate coins, a pirate flag (perfect for waving about, as babies like to do!), a mini hard-backed book and a brightly coloured bath boat. Perfect. Next time? The cake!
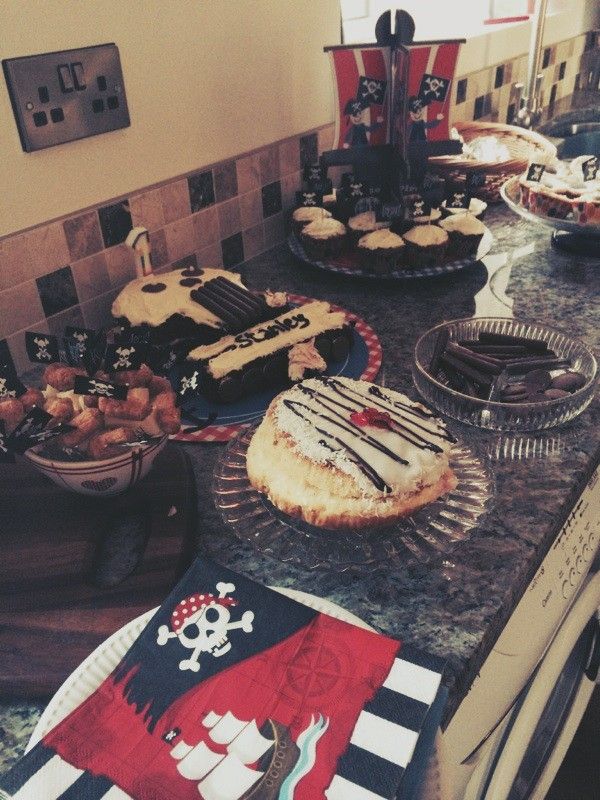
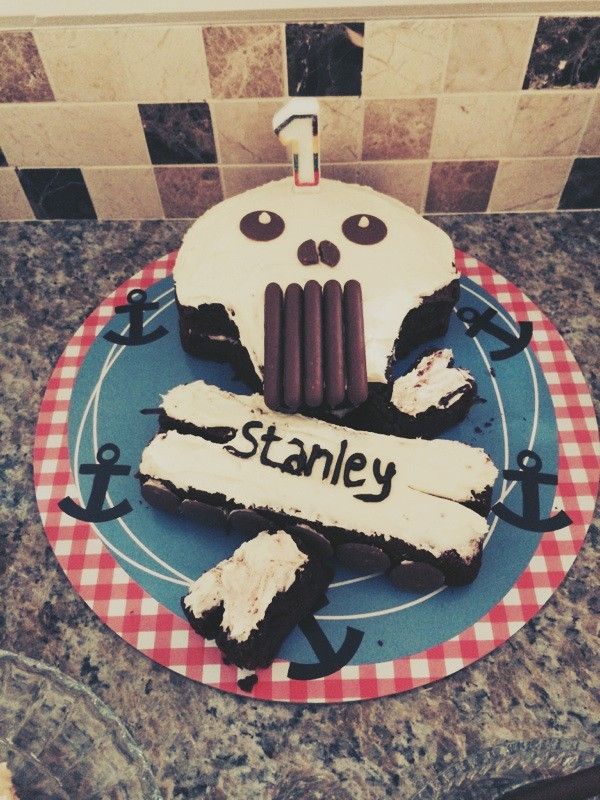 As promised, today I will be sharing my newest craft experience - decorating a cake! As my little pud was having a pirate-themed party, of course I needed the cake to fit the theme... it's a skull and crossbones cake, by the way. Just in case you were wondering! The red velvet sponge itself was a cheat (shhh! Betty Crocker all the way) but the most important thing for me was that I decorated it myself. This involved carefully cutting a round sponge, layered with cream cheese icing and raspberry jam, into a skull shape and spreading it with buttercream. The crossbones were baked in loaf tins and cut into shape. It wasn't easy! The chocolate finders and giant buttons finished off his face (at first I forgot the nose holes - it looked terrible). The hardest part had to be my freehand 'Stanley' using chocolate writing icing. The buzz once I'd finished was amazing! The guests all liked it, although there's always the chance that they're just being polite, but do you know what? It tasted GREAT! Next time I think I'm going to keep it simple, but my mother always made and decorated our birthday cakes over the years so it's always been something I wanted to do for my children too. Hmm better get practising over the next year... Watch this space for a few more baking adventures as my little pud gets bigger and wants to try his hand at baking...

