Friday, 25 July 2014

Clash of the colours

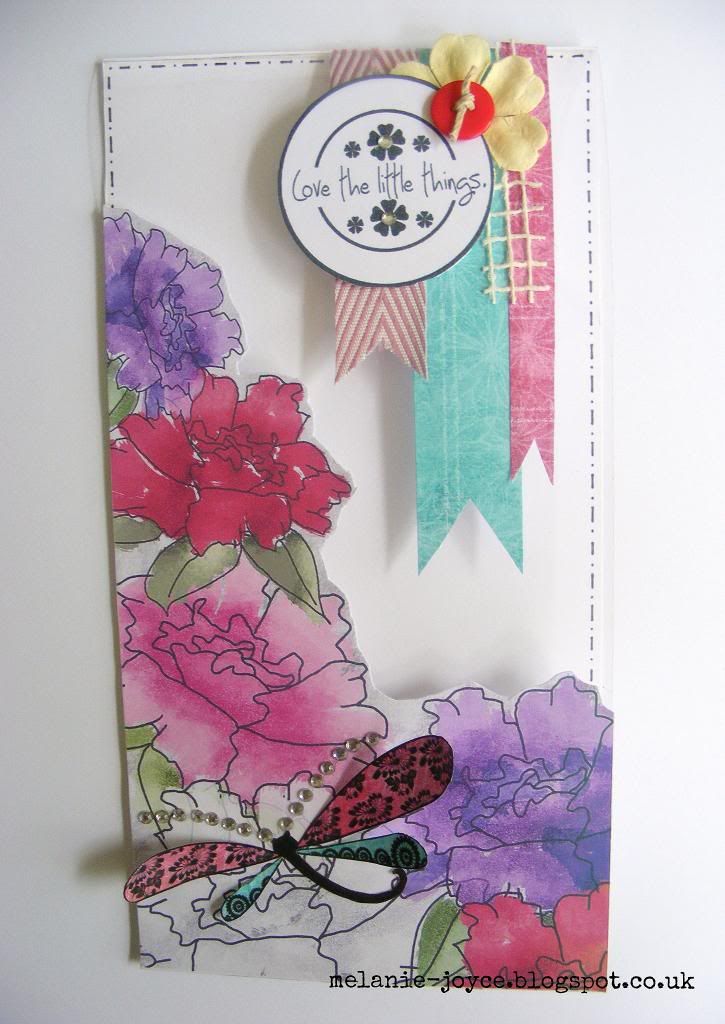
Hello again :) It's time for another card for the Polka Doodles challenge blog, and this time the theme is Clash of the Colours. Obviously it's not something I'm used to, so I found it a tricky one. In the end I plumped for this beautiful watercolour-effect paper from the Dolly Daydream Goes East CD, which I trimmed around and attached to an acetate card front (yes, my fascination with acetate continues!). I added faux stitches to the inside of the card blank with a black fine-line pen, so that it would show through the acetate.
The dragonfly was printed onto turquoise and red patterned papers from the CD, which I then cut out. I glued just the dragonfly's body and the tips of the wings onto the card front, giving it as much dimension as possible to allow it to stand out from the patterned paper. The final touch was some tiny diamante antennas. 
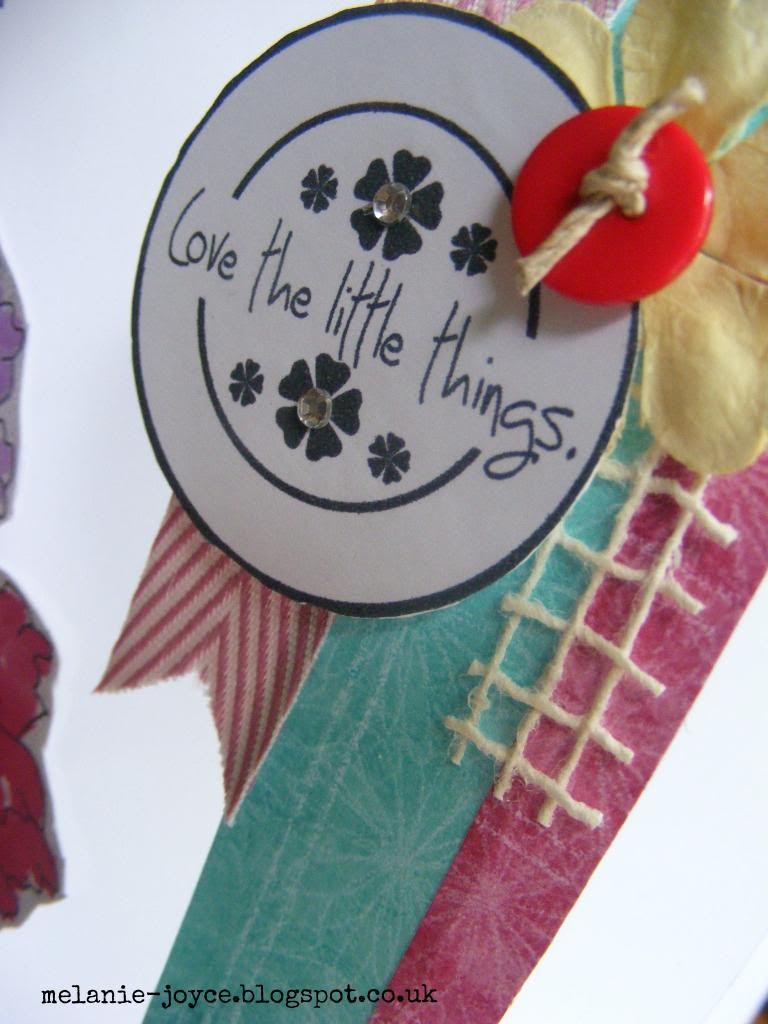
I cut banners of various lengths from the remainder of the red and turquoise patterned papers and stuck them to the top right-hand corner of the acetate card front. I then added a ribbon banner and a strip of white mesh ribbon, a paper flower and a red button. The sentiment is also from the CD, which I decorated with diamantes. I hope you like it! :)

Tuesday, 22 July 2014

Creative Cardmaking issue 69

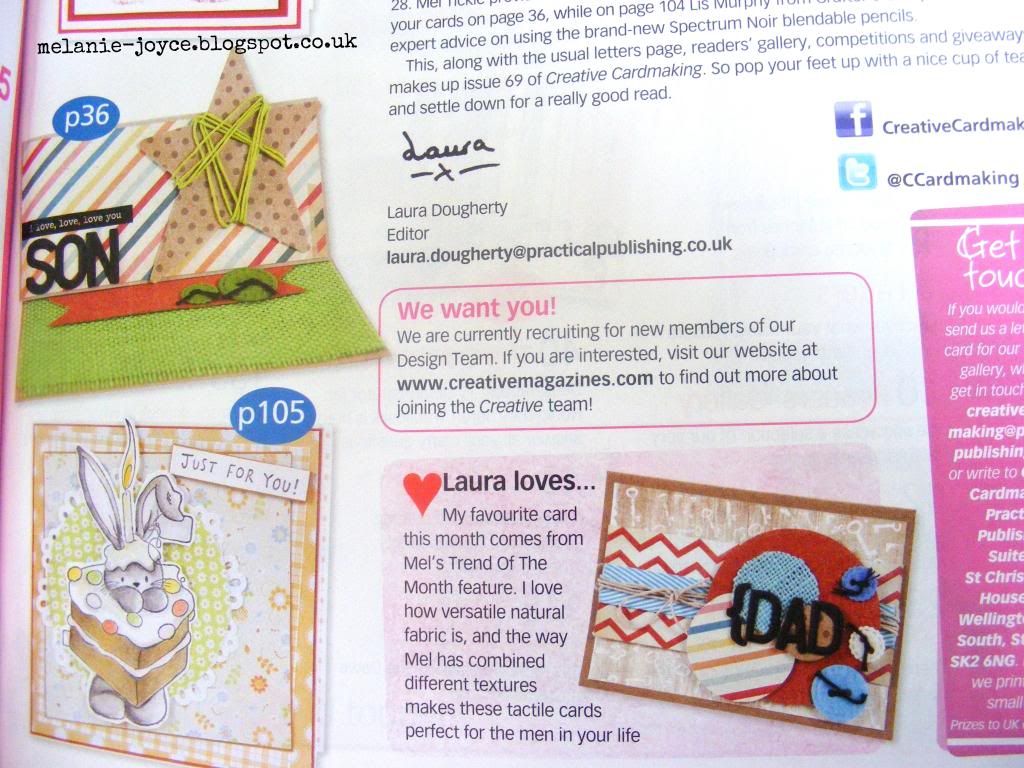
Hello lovely people! Another quick post from me today to show you some recent work that was published in Creative Cardmaking magazine issue 69. I'm excited about this one, as not only am I on the front cover but I also made the Laura Loves section on the welcome page! If you look closely you might also see another of my cards too :) 
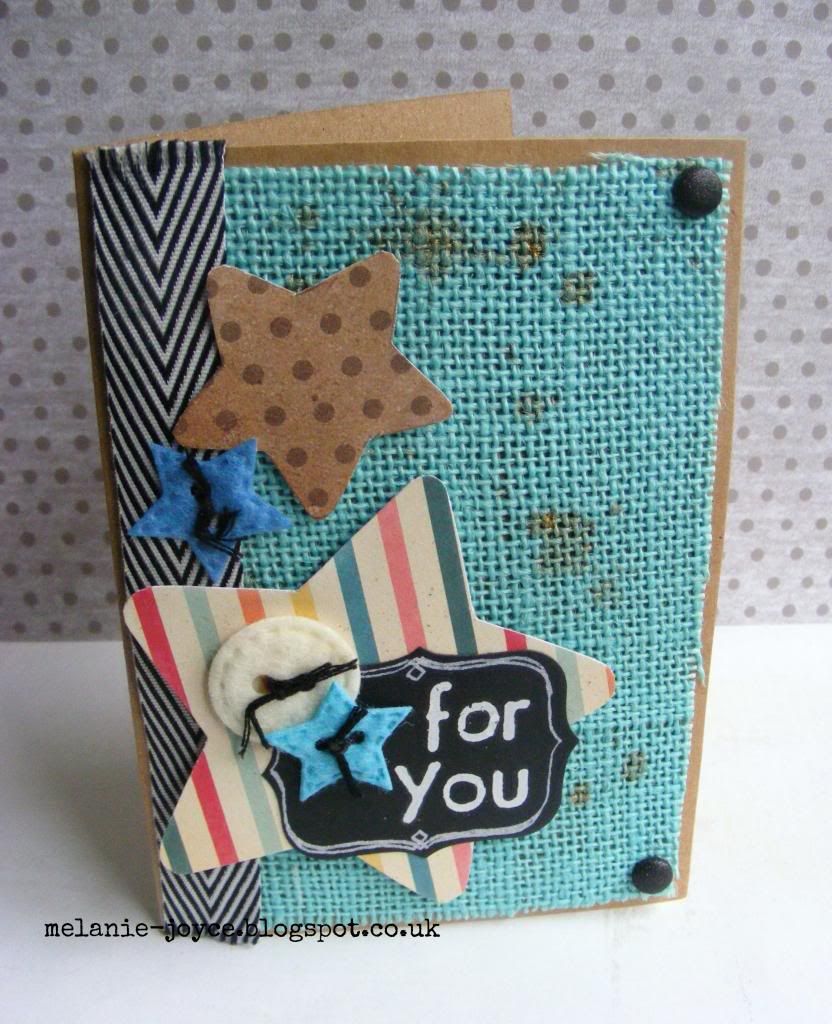
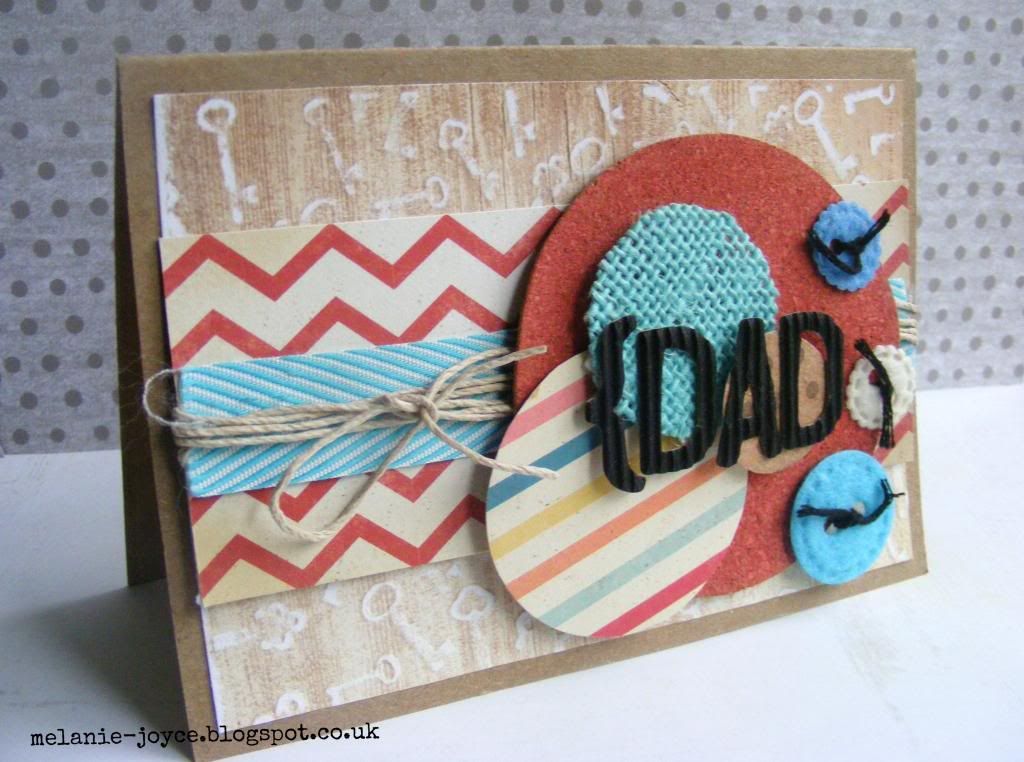
I was required to create some masculine cards using natural fabrics for this one, so I used some DCWV Mat Stacks such as cork, canvas and burlap. These were fab as they were in bright colours, and teamed with kraft cardstock and some natural hemp twine they made perfect cards for men. I also used some May Arts ribbon, felt buttons, Die'sire embossing folders and some fab American Crafts chalkboard labels - very on trend right now! Thanks for looking :)

Friday, 18 July 2014

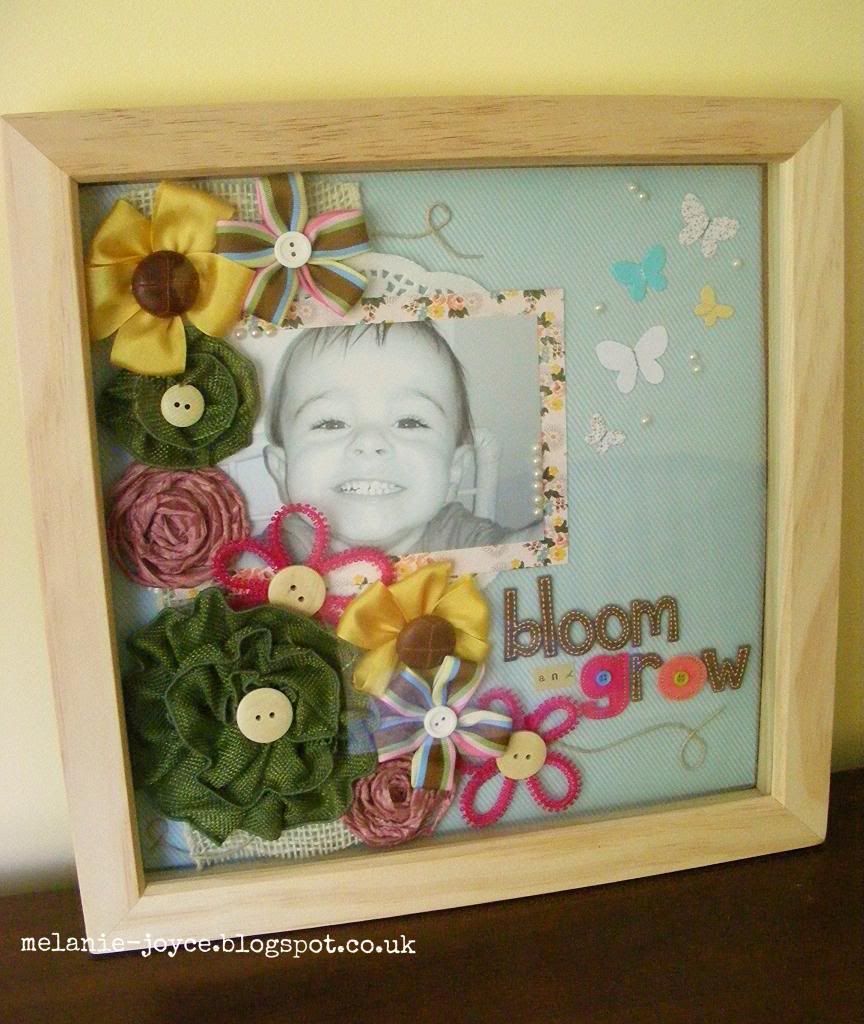
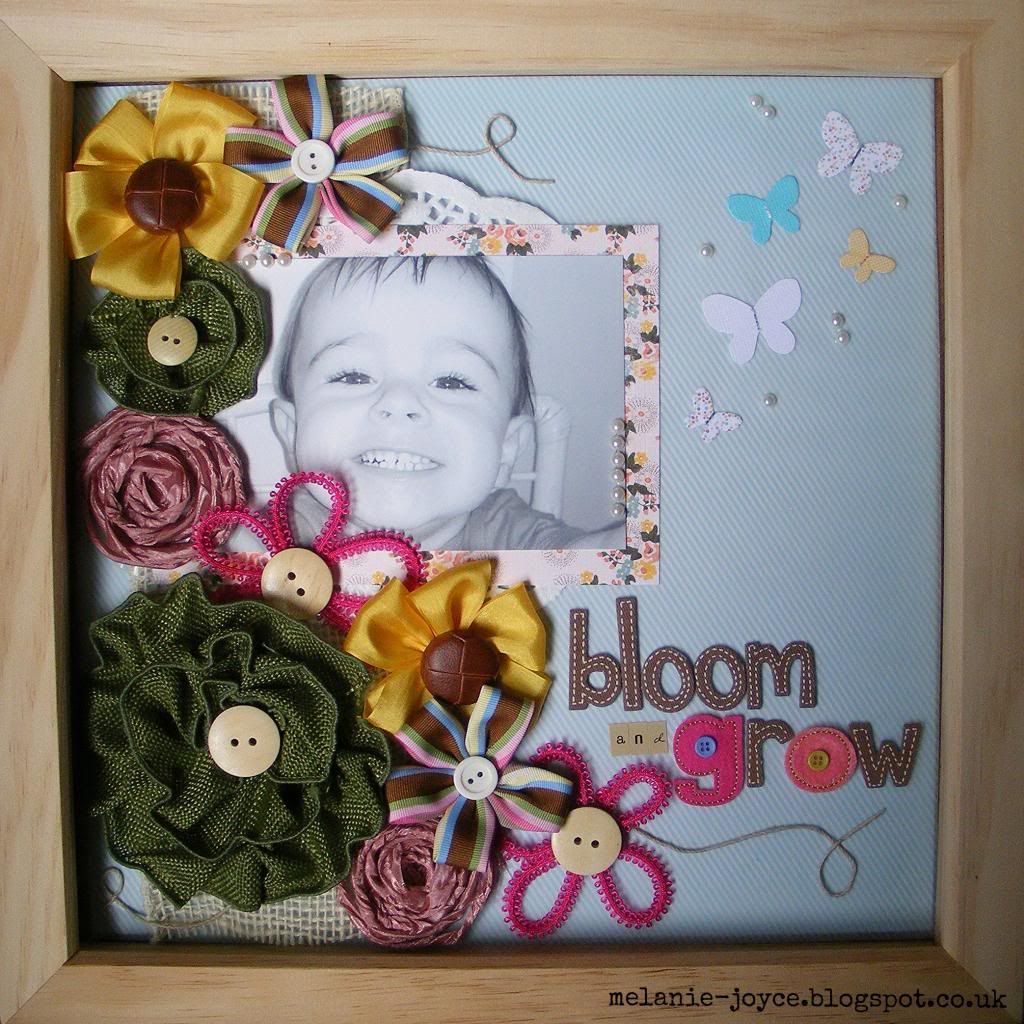
Bloom & grow shadow box - May Arts DT Finalist submission

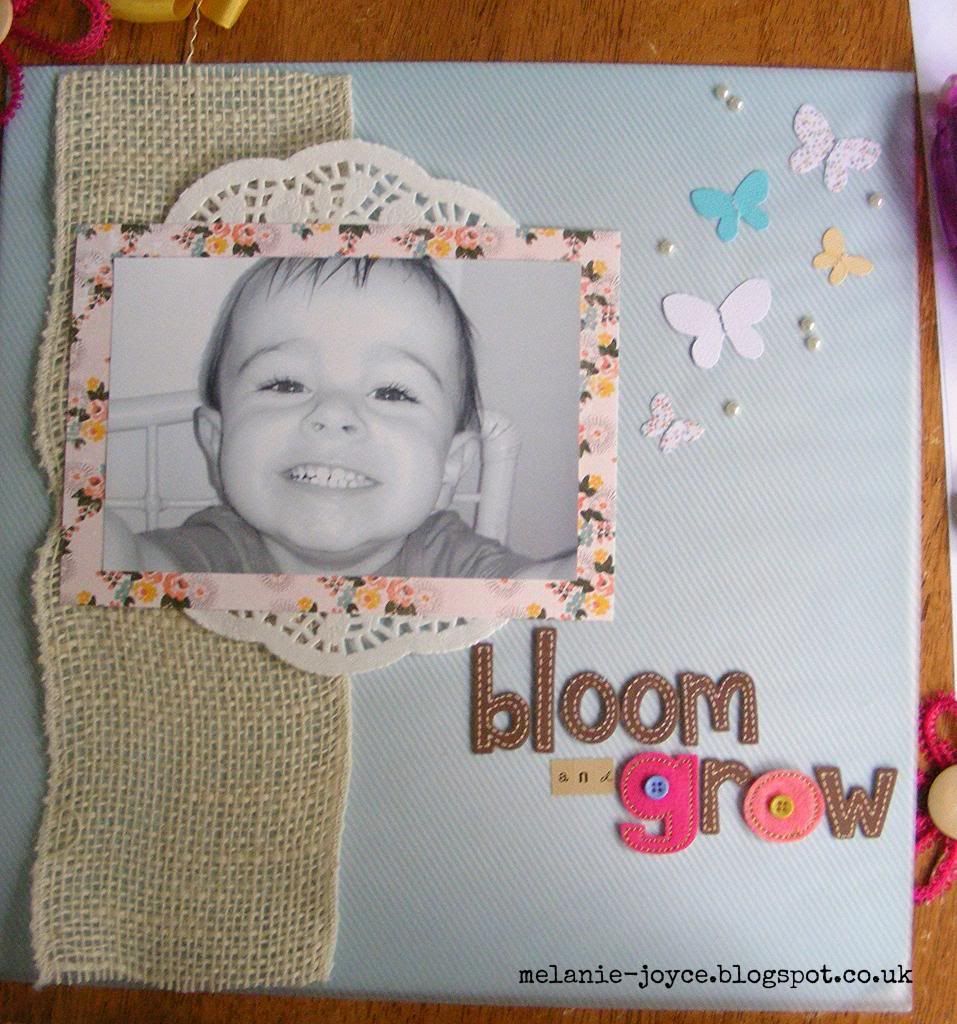
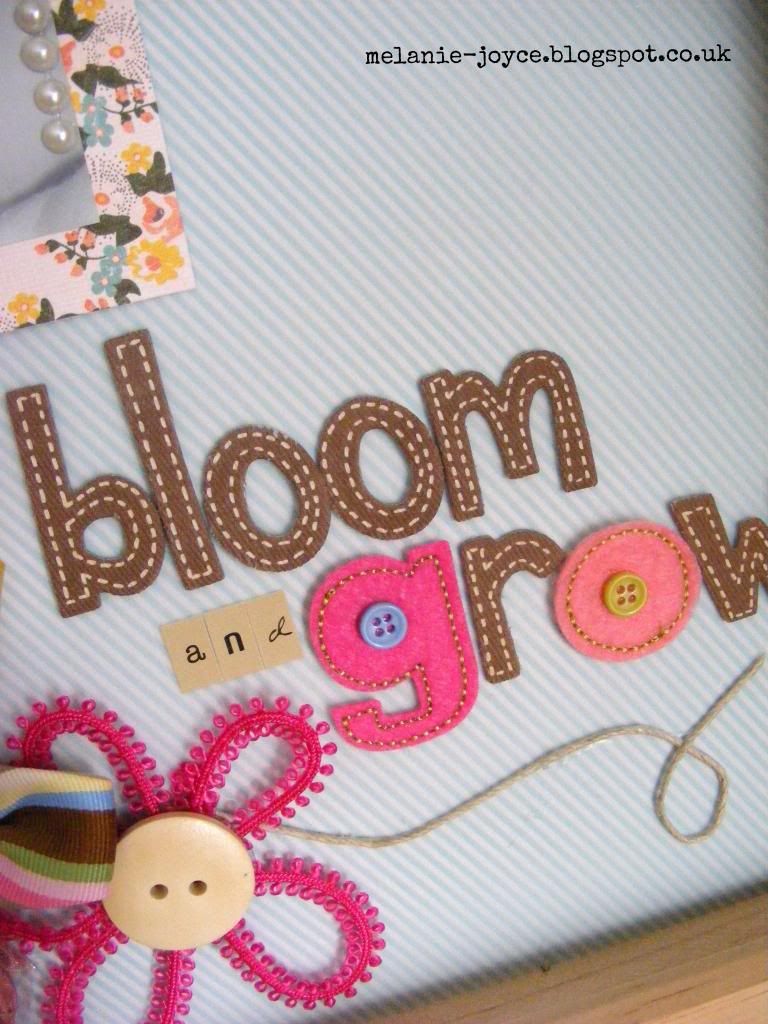
Today is the deadline for my submission to the May Arts Design Team and I'm very excited to show you my final project. It's a shadow box frame which is also part scrapbook layout, using a cascade of ribbon flowers as its focal point. I know many papercrafters may be daunted by handmade ribbon flowers, so for this project I'm going to show you that fantastic results are achievable with minimum stitching required.
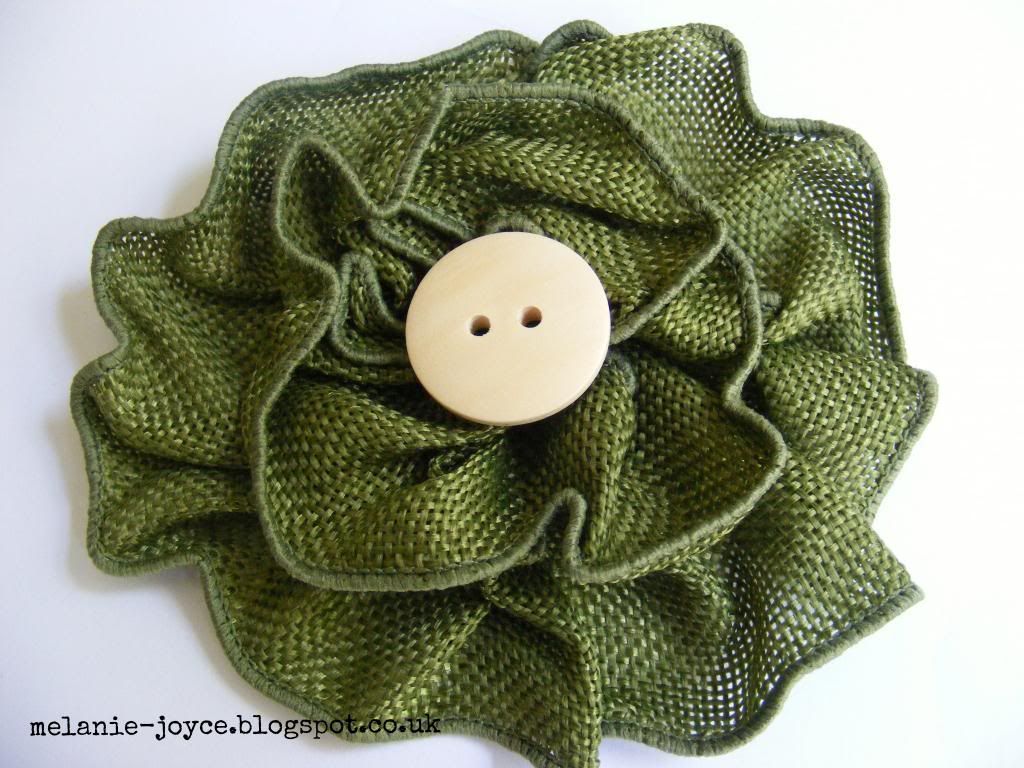
To do this, I used Cosmo Cricket Glubers to create some of my flowers. These are double-sided sticky pads especially for creating fabric flowers, but if you don't have them to hand you could also use a double-sided sticky sheet. Originally for the largest 3" flower you're required to use 18", 12" and 8" strips of fabric, which you hand-pleat around the edges of the Gruber, starting with the largest strip around the outside edge. However, as I was using 1.5"-wide faux burlap wired ribbon, I only used the 18" and 12" strips to make the largest flower, and a 12" and an 8" strip for the smallest. I found the wired edges of this ribbon really handy for creating a lovely gathered effect. Here's the finished result.
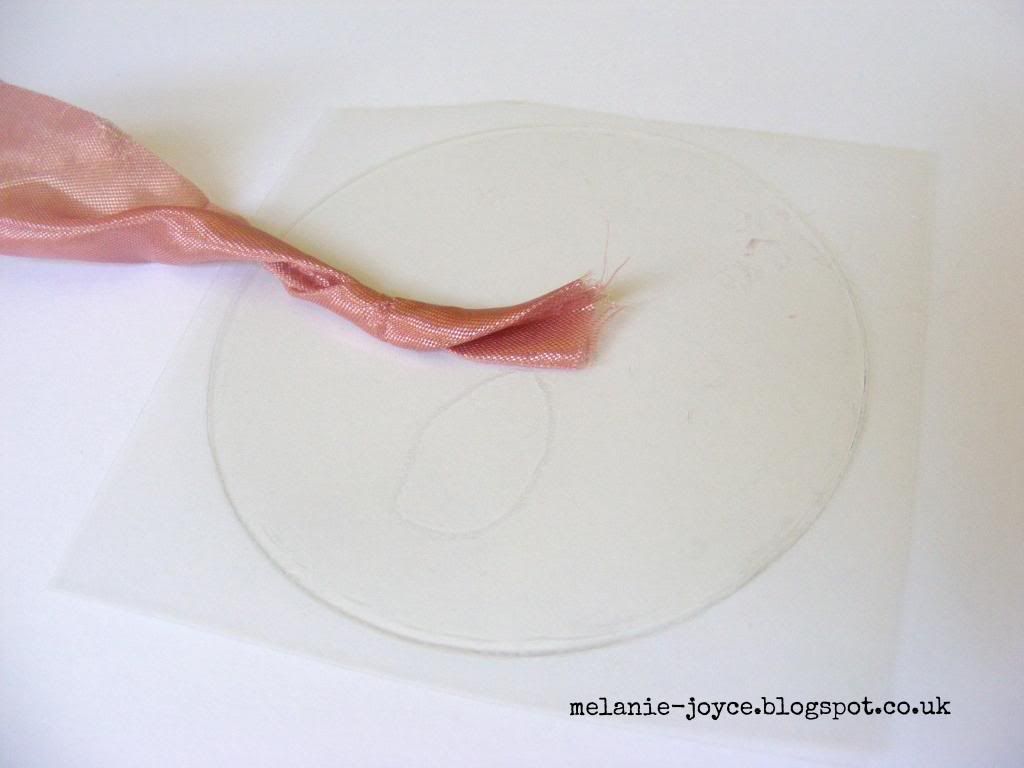
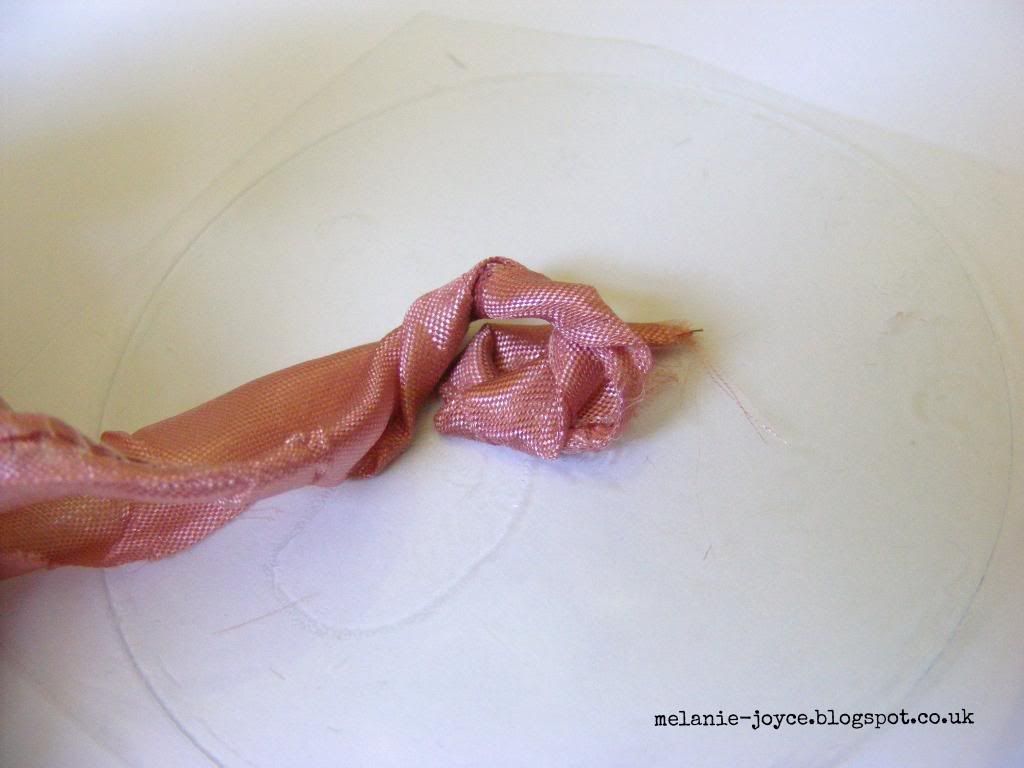
Of course, you don't have to stick to this technique to create no-stitch flowers. Another technique I've used here is the rolled technique. For this I used a yard of 2" pink silky crush wired ribbon, which I cut in half. I then secured the end of one half to a 3" Gruber.
Carefully twist the ribbon and begin to create a spiral around the centre point, keeping the ribbon taut as you go.
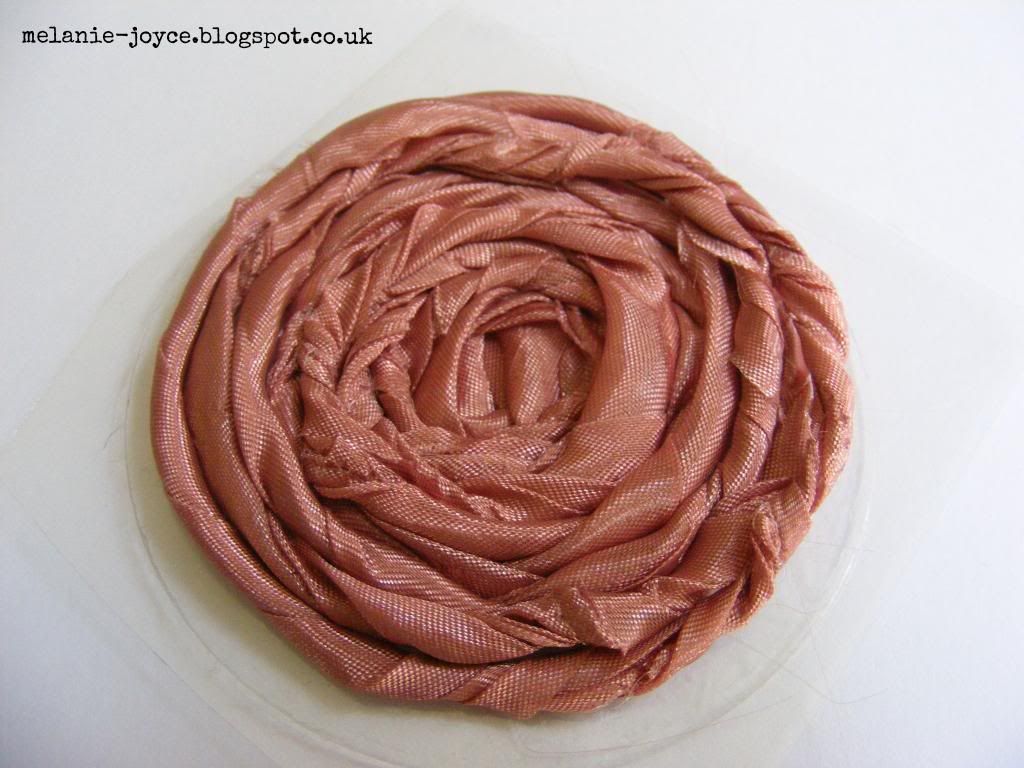
Continue spiralling the flower from the centre point, carefully twisting the ribbon and pressing the flower down so that it stays stuck to the sticky pad.
Twist your ribbon until it's all stuck down and you have created a rolled ribbon rose. I have found with this amount of ribbon you will have some excess sticky pad, so simply trim around the edges of the flower to finish.
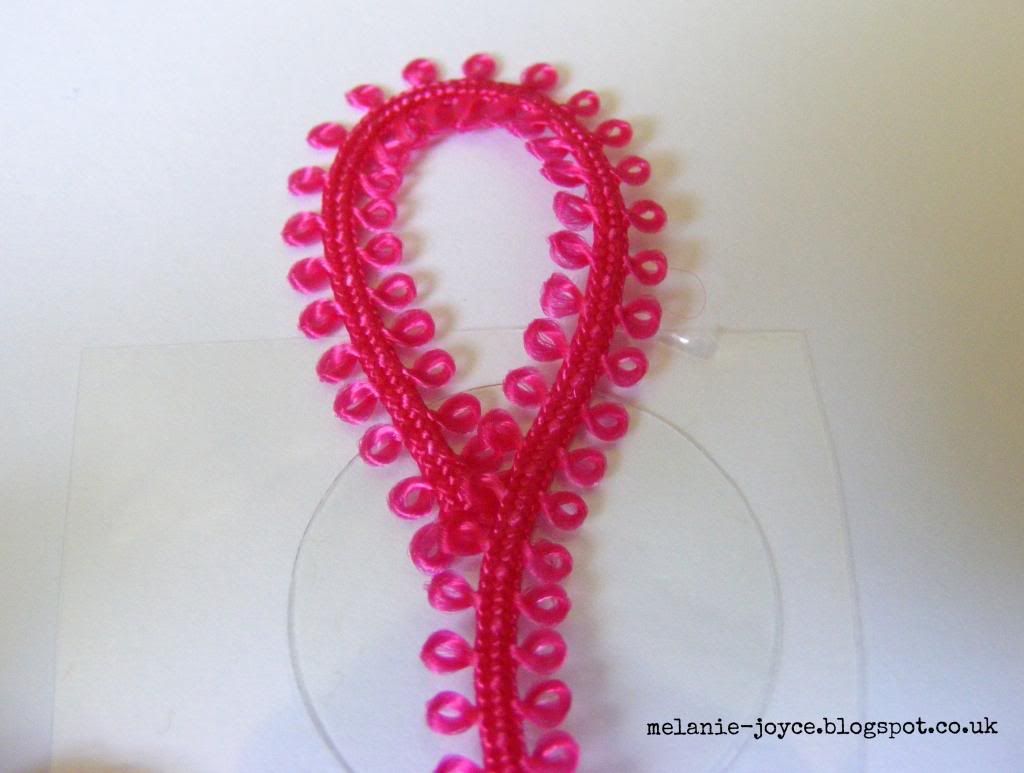
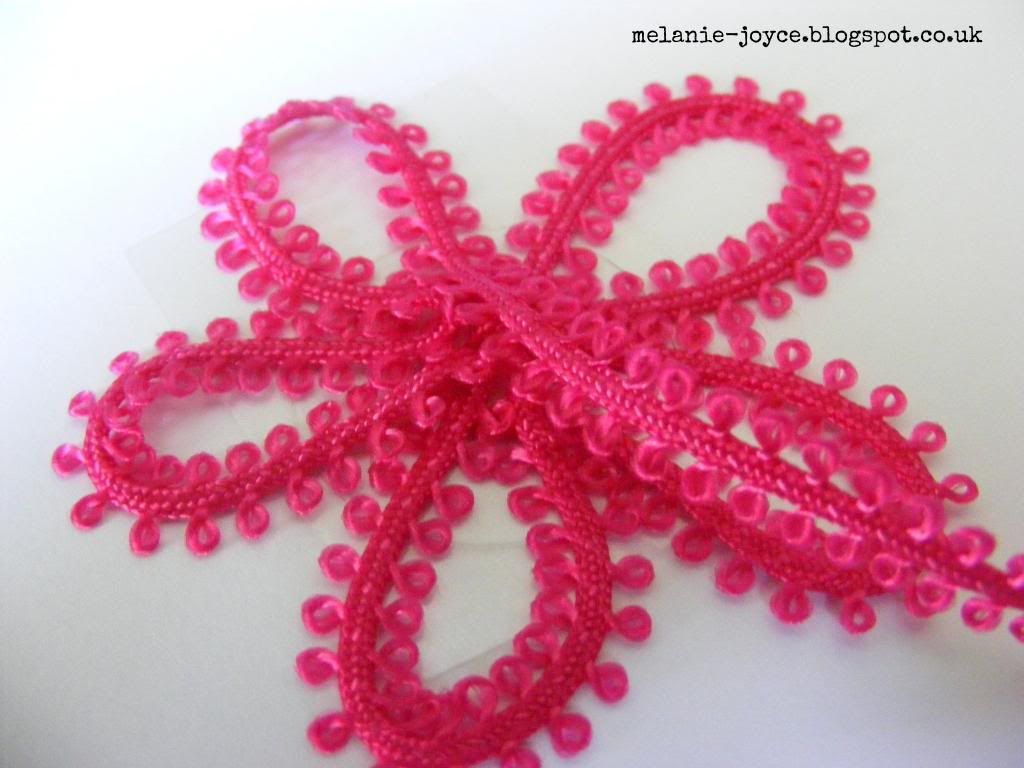
Another way of using these Grubers is to create a thin flower outline like the fuchsia flowers in this project. For this I used string looped ribbon and the smallest 1.5" Gruber. I started by sticking the end of the ribbon to the sticky pad and creating a loop.
Fold back the ribbon and form into a second loop shape next to the first. Stick down and fold again to create a third petal.
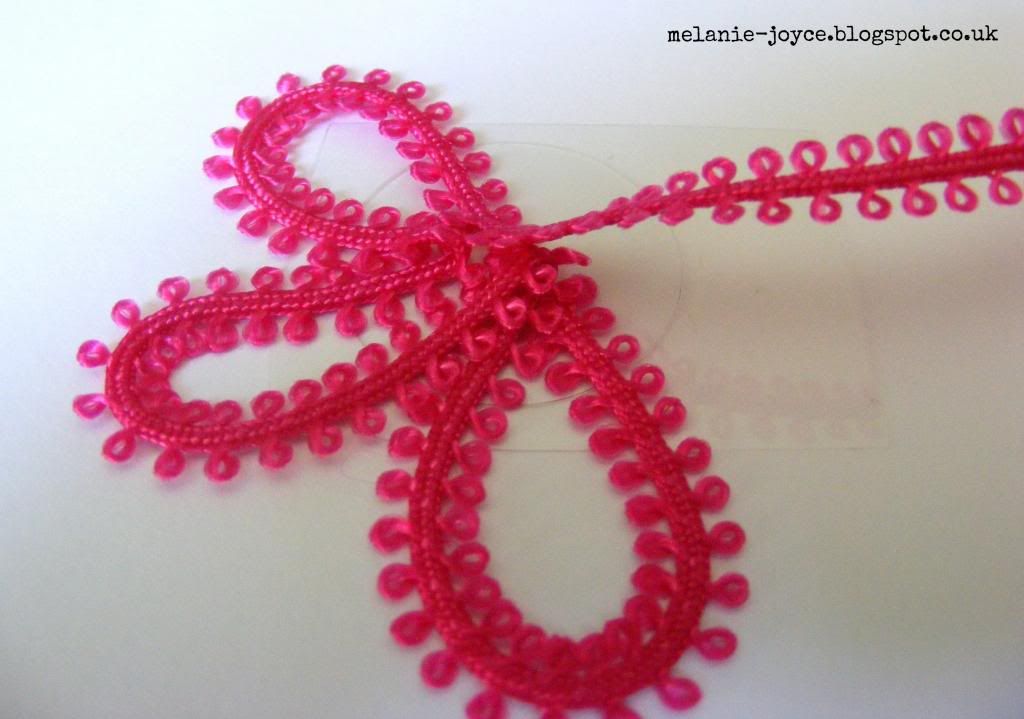
Continue forming loops until you have a total of five petals, then trim off any remaining ribbon in the centre. Don't worry about the excess ribbon, as this will be concealed at the back of the flower. Turn the flower over and cover the Gruber with a large wooden button.
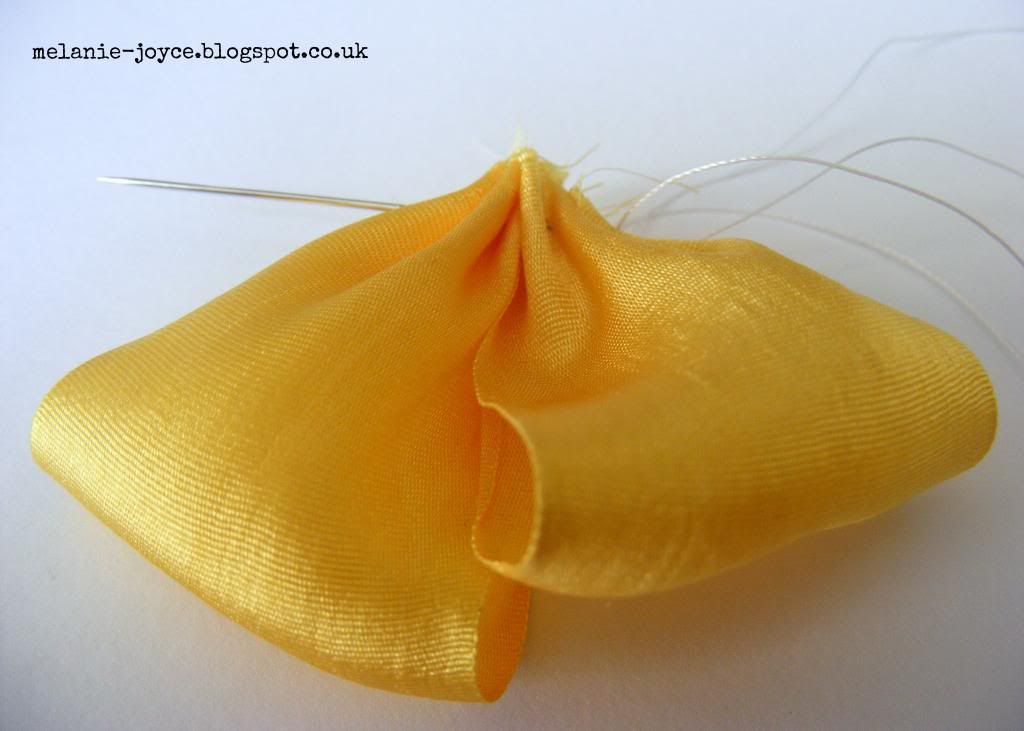
If you're feeling brave, there are ways to make beautiful flowers without large amounts of stitching involved, which is how I made my remaining two types of flower. For the yellow flower I cut five 3" pieces of silk 1.25" ribbon. I then took my first piece of ribbon, folded it gently so the edges met and threaded a needle through, pushing the ribbon towards the end of the needle but not threading it through.
Repeat with the remaining petals, pushing each petal towards the end of the needle.
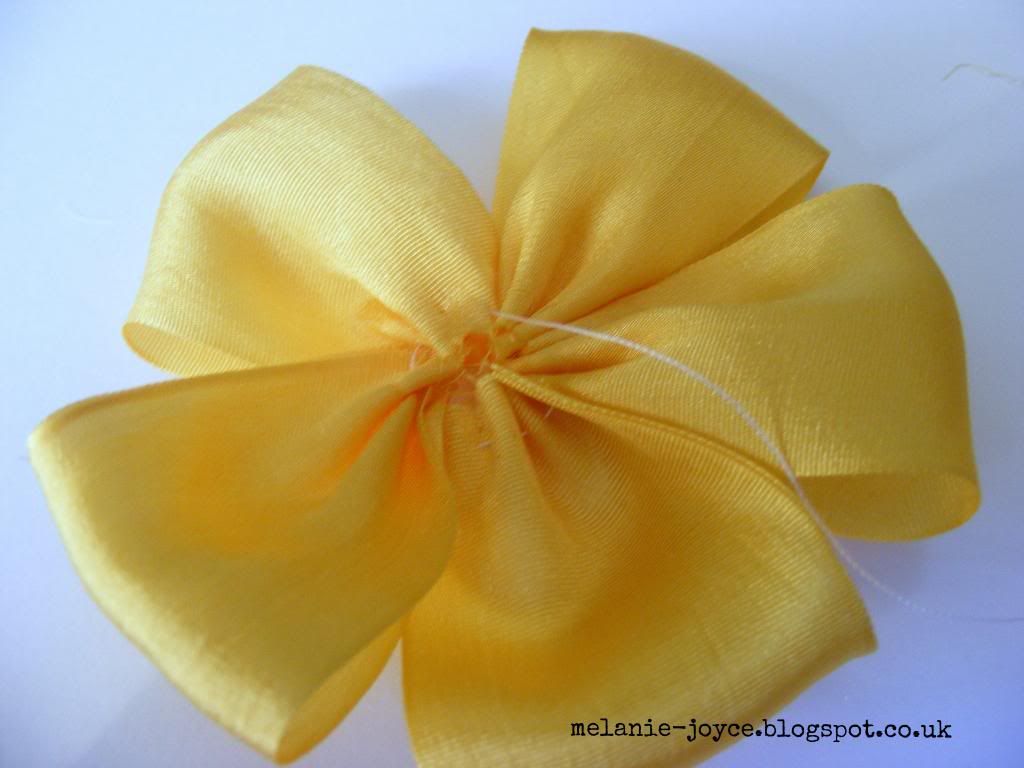
Once all five petals are threaded onto the needle, pull the thread tightly to create your flower shape. Stitch the first and last petals together and secure.
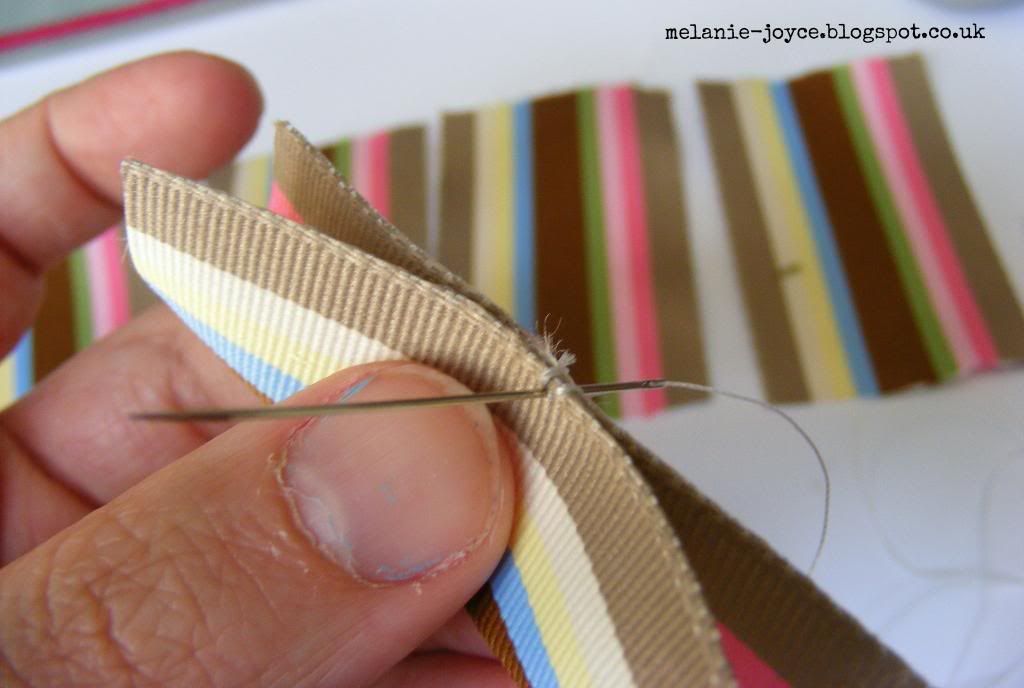
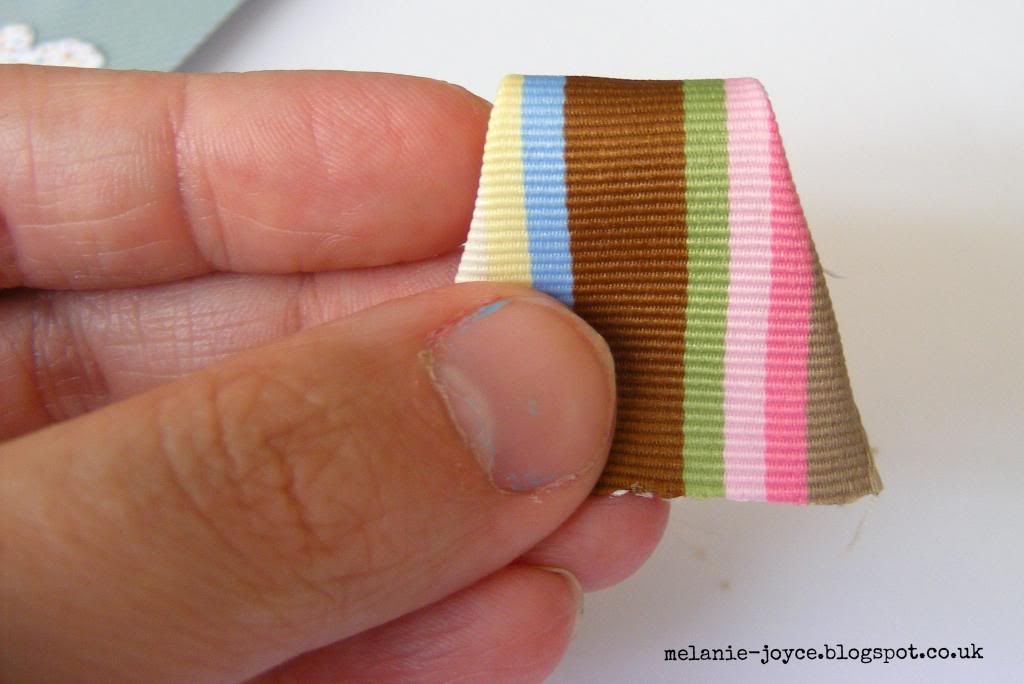
A slightly different method was used to create the striped flower. For this I used 1.5" striped grosgrain ribbon, which I cut into five 2.5" pieces. I then took my first piece and squeezed the two longest edges together, sewing them with a few simple stitches.
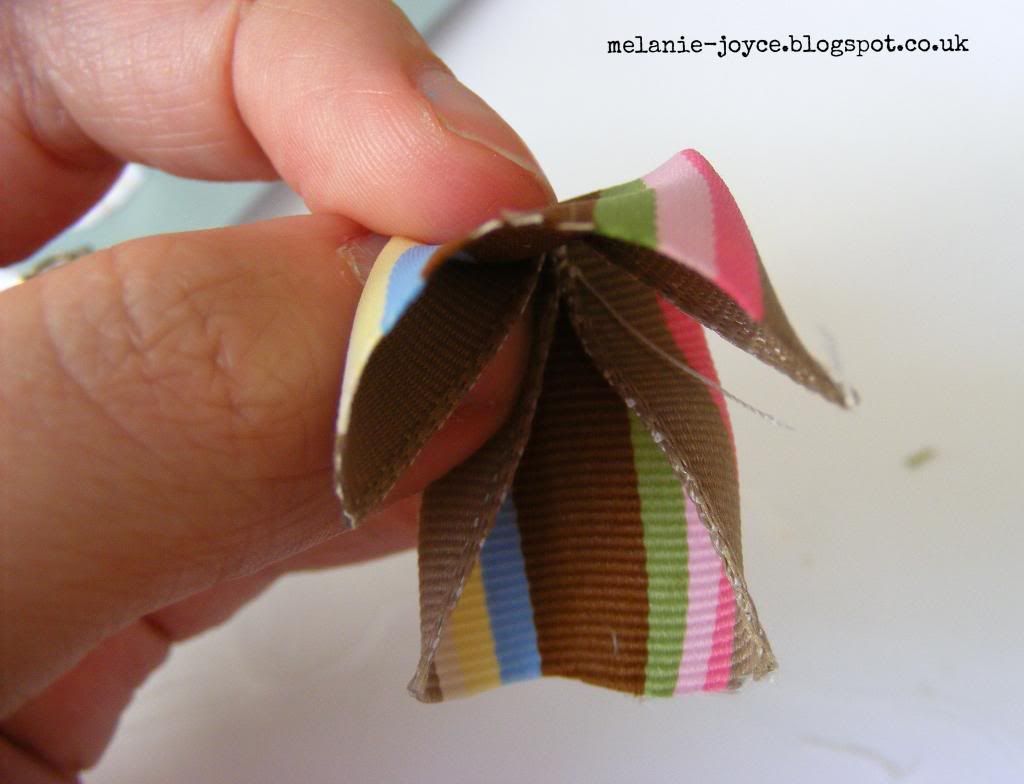
I then pushed the stitched section towards the back of the ribbon and folded over.
Once folded, your ribbon will either make a petal shape, as mine has here, or a pointed petal shape, depending on the width of the ribbon you're using.
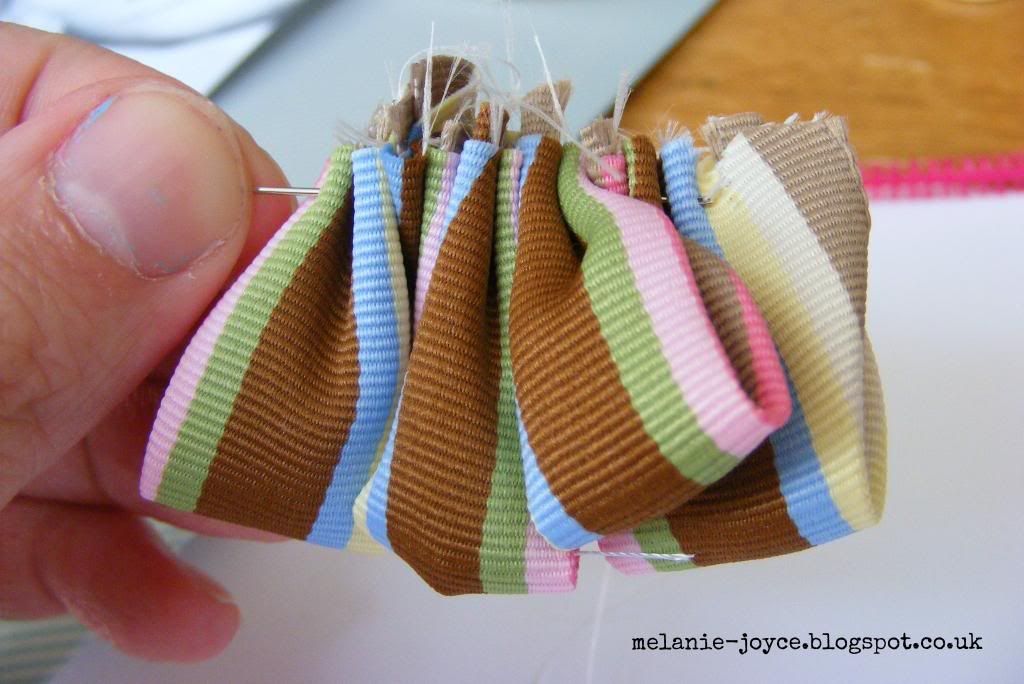
As before, thread your first petal onto a threaded needle, pushing it towards the end of the needle as you continue adding the remaining petals.
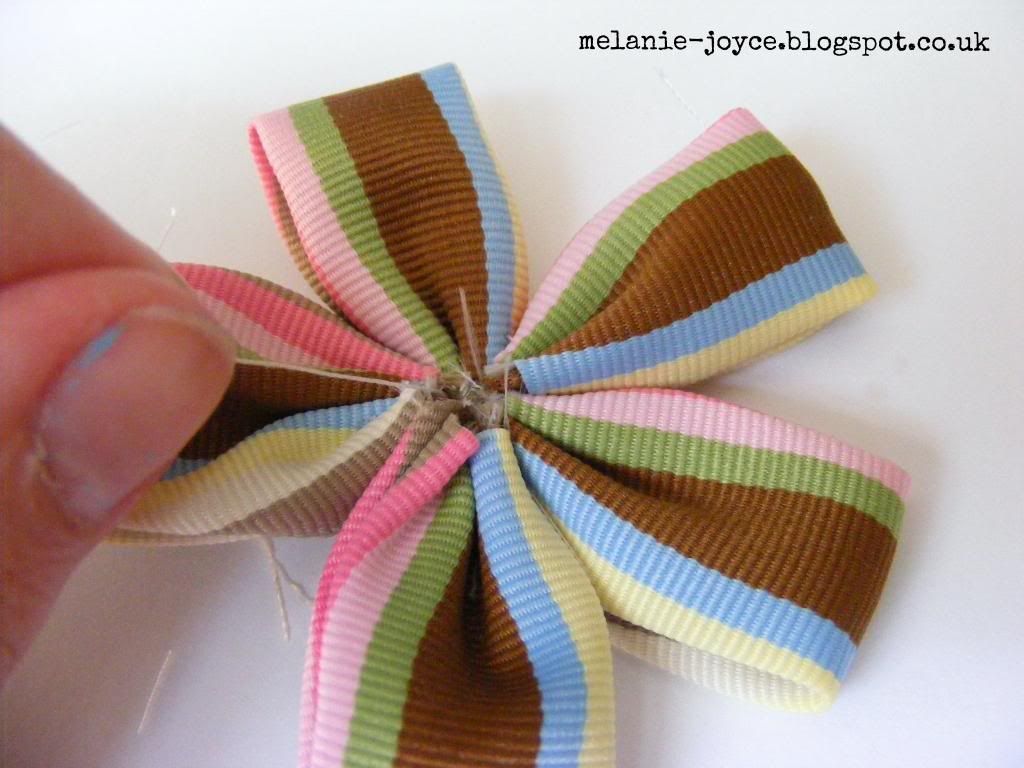
Once all five petals are on your needle, thread it through the ribbon and pull tightly. Stitch the first and last petals together to create your finished flower shape, then secure with a few extra stitches on the back of the flower.
Once I had finished my flowers I secured a large piece of 4"-wide natural burlap down the left-hand side of the page. I matted my photograph with Authentique Grace Sweetness patterned paper and adhered a small doily the photo. I then mounted it in the top-left corner of the page and added my title in the bottom-right corner.
I layered my flowers up around the left-hand side of the photograph, then added pearls and hemp twine tendrils to finish the project, before placing it in my shadow box frame. I hope you like it, I'm certainly very proud of it and even if I don't make it onto the design team, I'm sure you will definitely be seeing more ribbon flowers popping up on my cards and layouts from now on :)

Christmas in July!

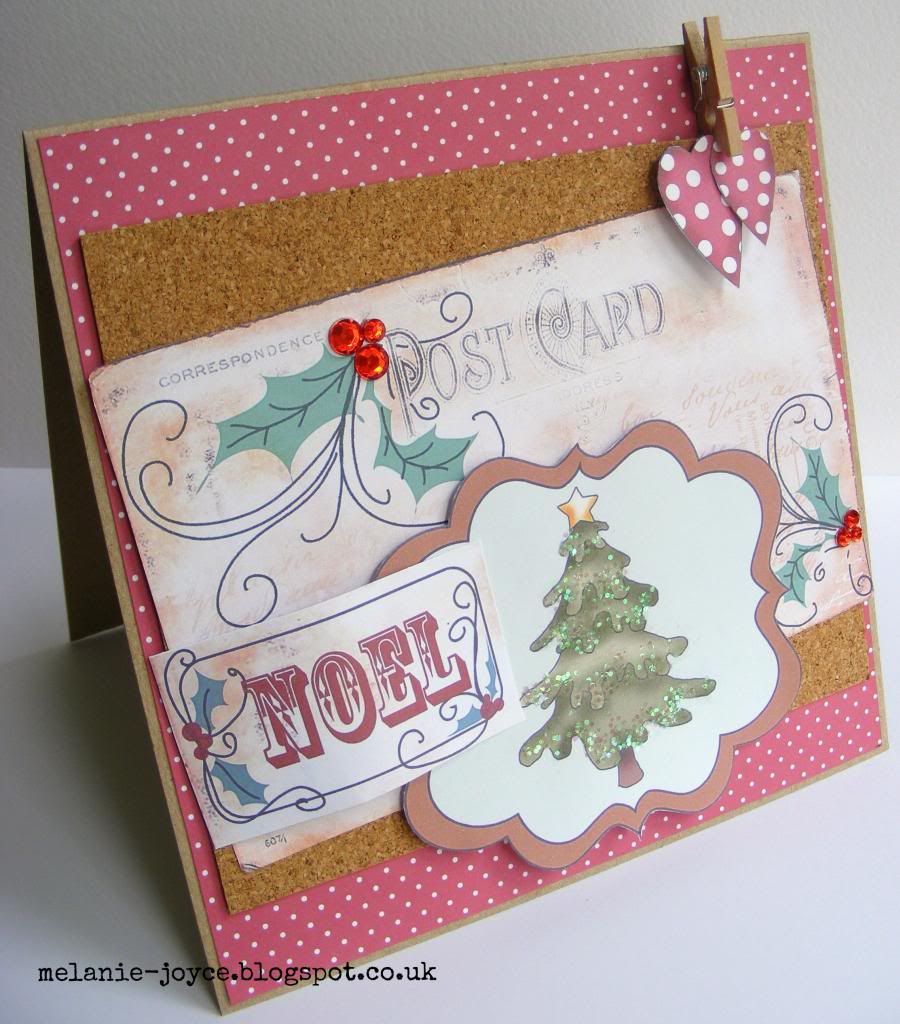
Today is my first challenge for the Polka Doodles blog, and it's a Christmas make with a little bit of added twinkle. All the of the elements used are from the Polka Doodles Work and Play Festive Hollybobs collection - I love this red polka dot paper, and it's the third time I've used it! The traditional-style postcard was my inspiration for the card and I decided to run with the traditional theme, using classic red and green, kraft card, natural cork and a co-ordinating sentiment tag.
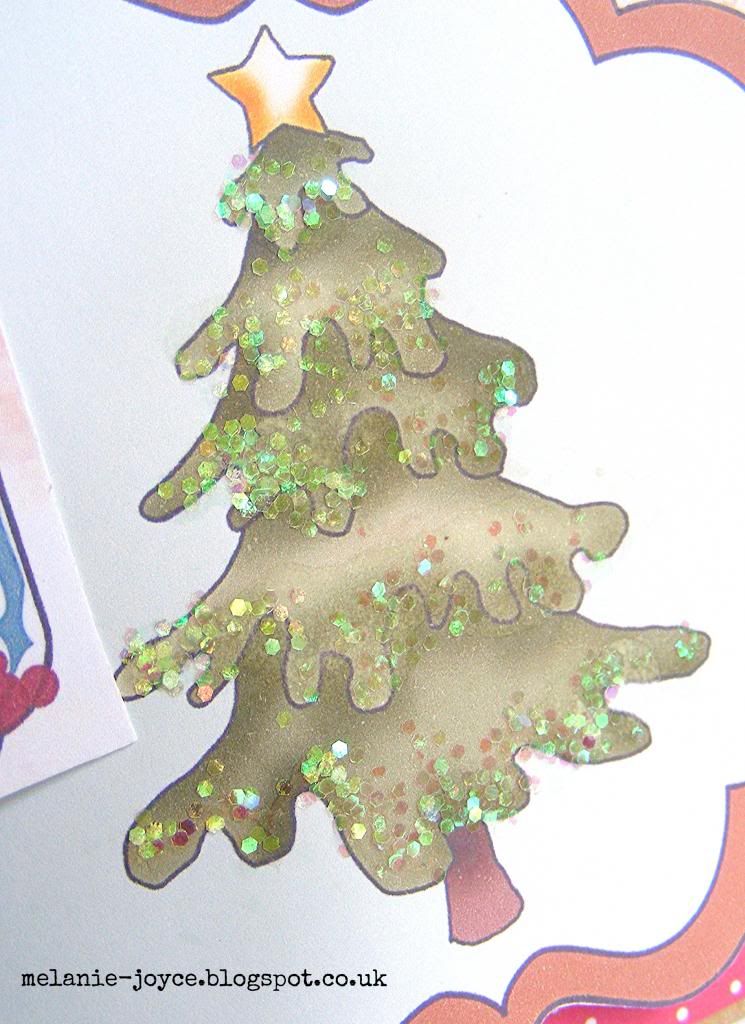
For the bling, it just had to be gorgeous red gem berries on the holly, but I also added tacky glue and some iridescent glitter to the Christmas tree for some added interest and dimension. I tried to do it across the bottom of the branches in a snow effect, and I think it looks very pretty! Hope you like it - I'm now off to de-glitter the house ;)

Tuesday, 15 July 2014

Acetate flower card

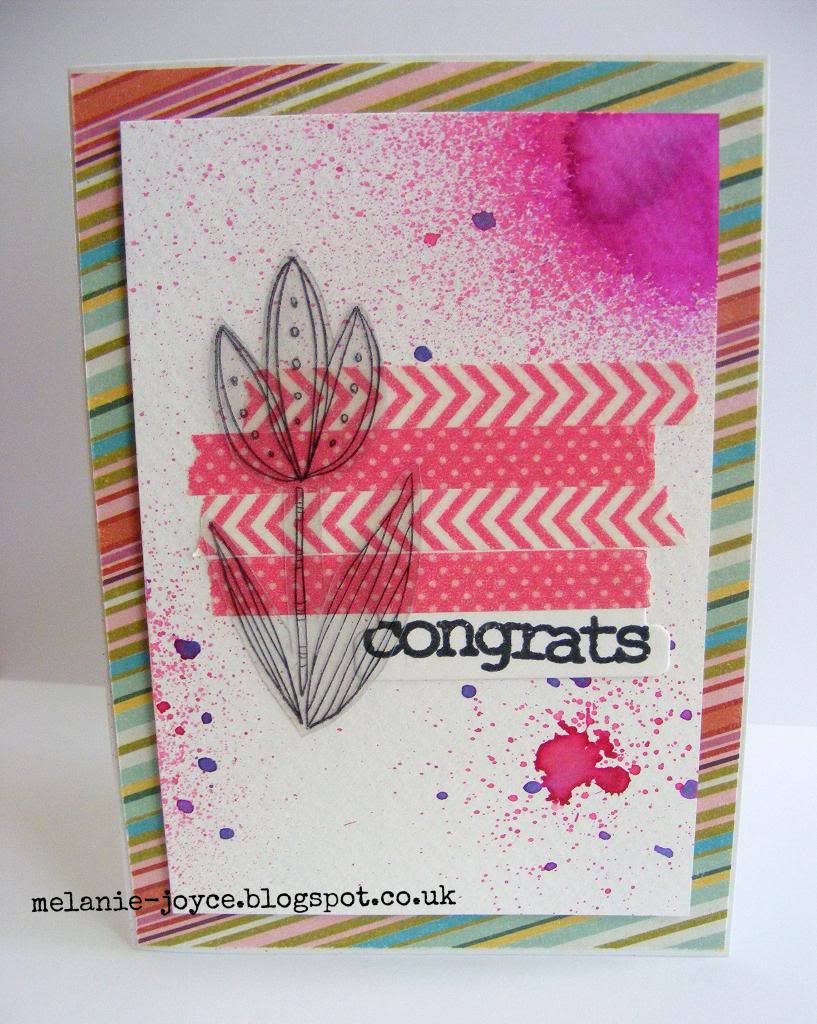
Hello! I'm back with another card design today, which I created for a friend who started her new job this week. This one is a little bit of a departure from my usual clean and simple style - it's got lots going on - ink spray, Washi tape, a stamped sentiment, patterned paper, watercolour card and a stamped acetate flower. I've had the Cosmic Shimmer Mister ink sprays for a few weeks and I'd used them here and there but I've been dying to use them for a splattered background like this one!
The card came together really quickly as it was all randomly designed in my head. When I do this, I often deviate once I start to make the card but on this occasion I pretty much stuck to my original imagined design. I don't know what made me think of the acetate flower, but I was really pleased with the finished effect. The flower is from the Inkadinkado Doodle Flowers stamp set and the Washi tape is from Pebbles Inc. I was a bit stubborn with the acetate flower and ploughed ahead without actually knowing how I was going to adhere it to the card! In the end, I had the idea to use a Xyron sticker maker, which was perfect. I practised on a piece of scrap acetate first and found that the thin layer of adhesive could still be seen through the acetate, giving a kind of frosted effect. However, it disappeared once the acetate was placed on the card, leaving a perfect suspended flower without any gluey mess or visible adhesive. I hope you like it! :)

Sunday, 13 July 2014

Vintage Florals

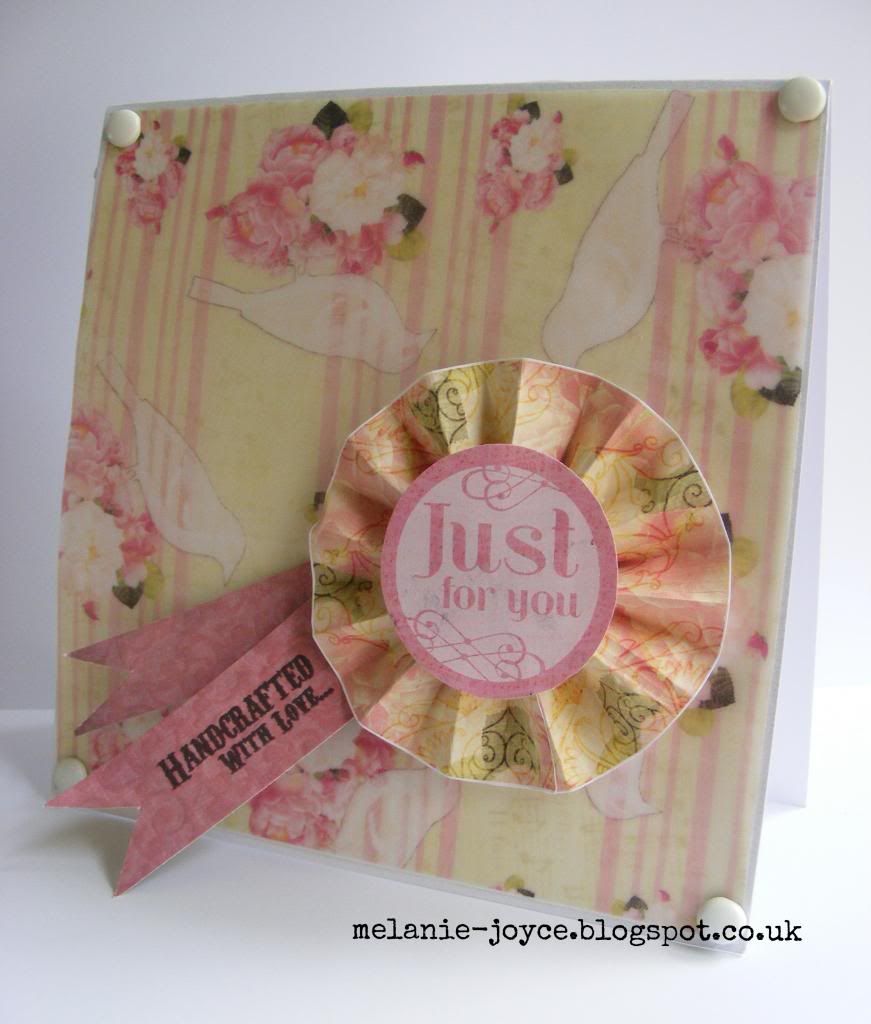
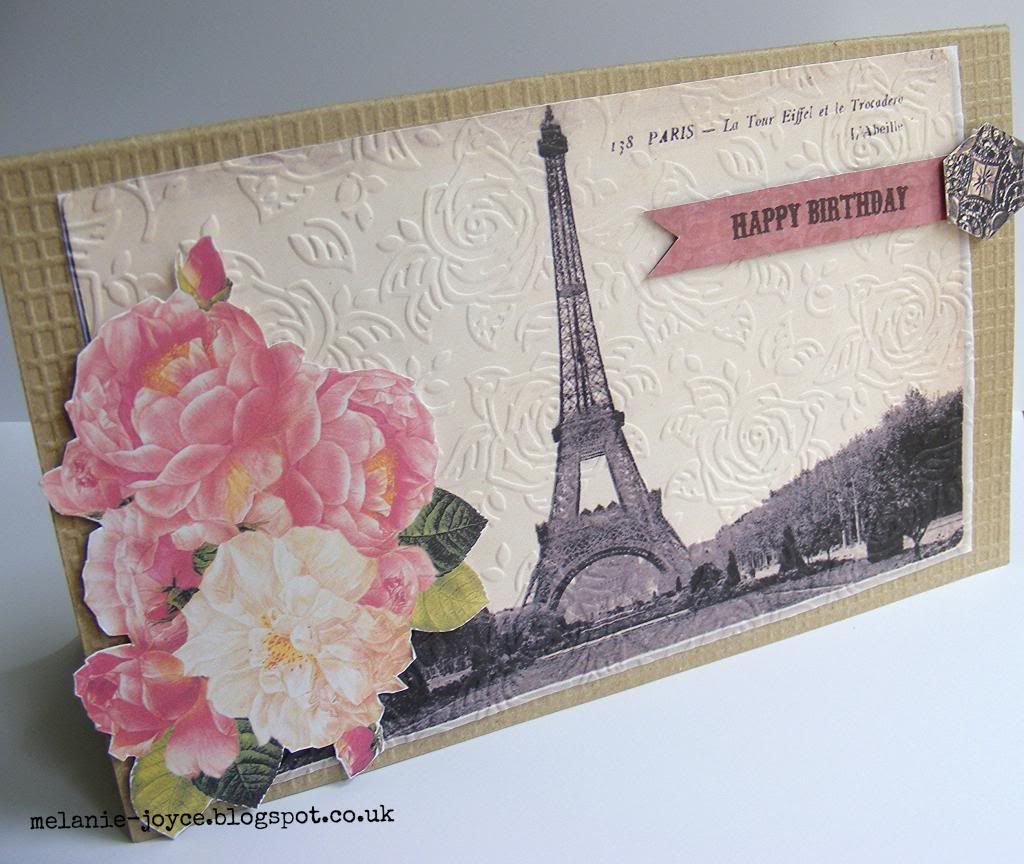
Hello lovelies! I've had a lovely relaxed Sunday and feel very organised after Stanley's mammoth 3.5-hour nap allowed me to catch up on a bit of cleaning, tidying and washing ;) Now the World Cup final has started and my husband is entertained, I thought it was the perfect opportunity to update you on yesterday's demo for Crafter's Companion at Sycamore Park garden centre in Ellesmere Port and show you a couple of new samples made especially for the event. They're using the fabulous new Vintage Florals collection and the top card features a patterned paper that I actually printed onto printable vellum, which gives such a stunning, delicate effect, and the rosette was created using elements from the CD. Meanwhile, the bottom card utilizes not one but two embossing folders from the range. I added texture to the digital postcard using the Decadent Rose 8x8" embossing folder, and the card blank was made from a piece of kraft cardstock that I embossed using the Hessian A4 embossing folder. The embossing folders have proved very popular with the ladies at both the demos I've done using them.
Fortunately I was able to use a lot of samples from my previous demo, as I was using all the same products, but I added a few new ones here and there just to mix things up a bit. The demo itself was fab and I had a brilliant day - the ladies in Ellesmere Port were such a friendly, chatty bunch, it was a lot of fun and I got some great feedback which was a welcome confidence boost! I don't have another demo booked in now until September, plenty of time to have a play and take my Spectrum Noir accreditation test ;) That's it for now (it looks like it's going to penalties!), but I'll be back again very soon :)
Friday, 11 July 2014

Simply Homemade issue 44

Hello again. Just a quick one from me today as I've been busy prepping a demo for Saturday at Sycamore Park Garden Centre in Sutton. I'll be there from 10am-4pm, so if you're visiting the area (and you're not at the Doncaster show!), please pop in and say hi.
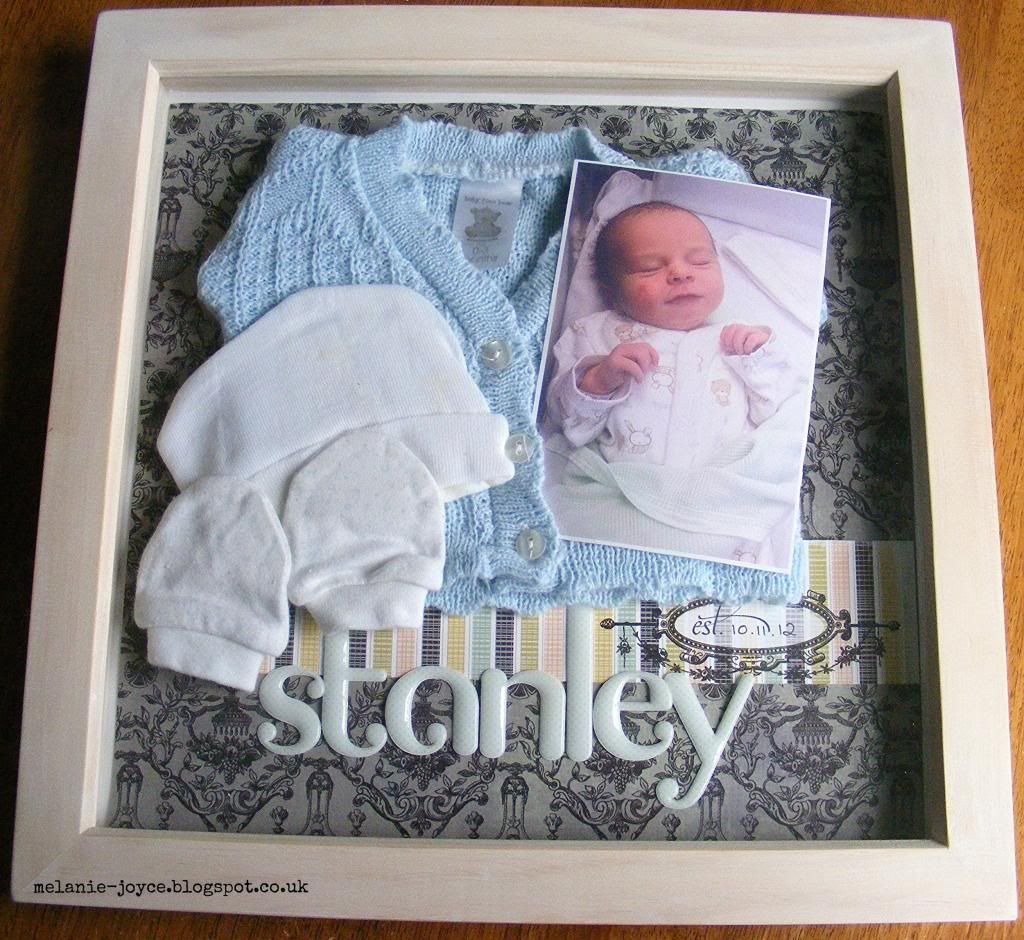
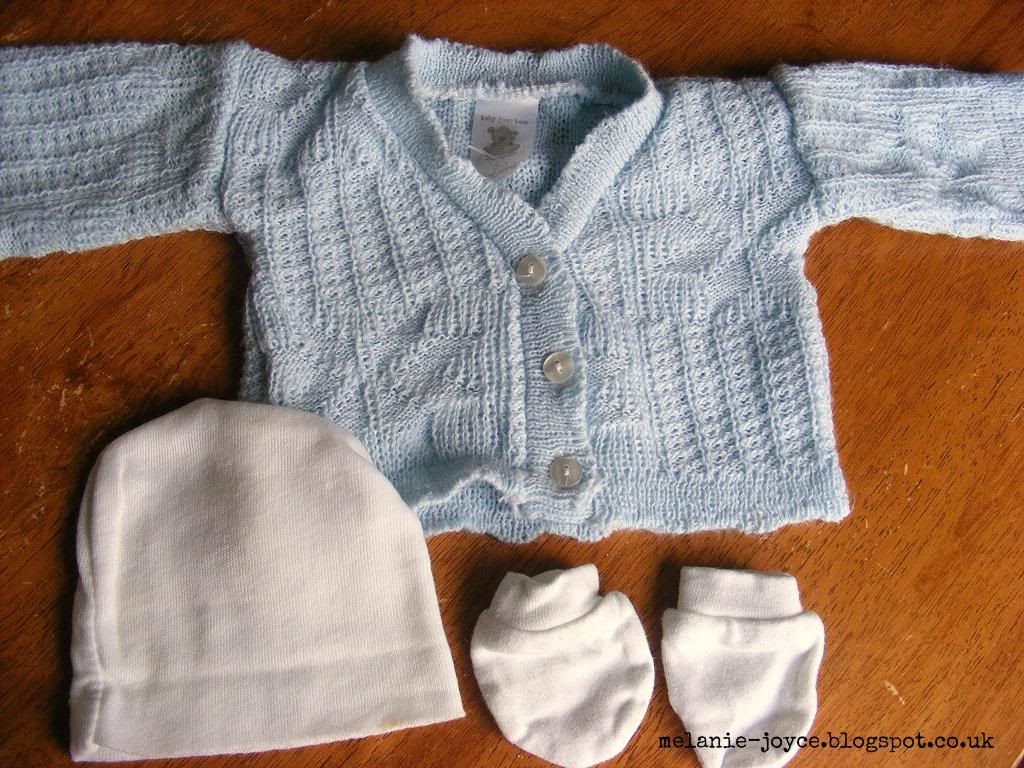
It's something a little bit different from me today - a shadow box for Simply Homemade magazine that I made quite a while ago for some precious items of Stanley's. The hat is the one they popped on his head when he was first born (and consequently it's unwashed - as if I'm ever going to wash it!), and the scratch mitts were put on his little hands the first time my husband carefully dressed him, with the help of the midwife. He wore the little blue cardigan on the way home from the hsopital. While I had lots of babygrows, being a first-time mum I was grossly unprepared for the November weather and didn't bring a coat for him and wasn't sure what a newborn wears to be taken home, so he wore about 17 layers and we used a blanket to keep him warm instead! At least next time I won't be quite so clueless.
As well as preparing the items for inside the shadow box, I also altered the frame, using white acrylic paint to create a white-washed effect on what was once a plain wooden frame. Upcycling wood and furniture isn't something I do very often, but I would love to do some more of it over the coming months. I feel an action plan coming on! So that's my shadow box, and once I get it back from the magazine, it's going pride of place in Stanley's room. That's all for now, have a great weekend :)

Friday, 4 July 2014

Exciting news!

Well, I know I ended my last post with mention of some exciting news, so here it finally is! I've joined the Design Team over at Polka Doodles and I've been beavering away the last few days creating samples for the latest release - which just so happens to be Christmas ;) After my publishing days I'm well rehearsed at working on Christmas in July - it takes a while to get into the swing of things at first, but before you know it you find yourself humming carols! I really enjoyed creating my samples and they're all ready to post off tomorrow. I'm afraid I can't show you anything just yet, but don't fear - I'll be sharing more cards I've made using the gorgeous Festive Hollybobs Work & Play collection CD over the coming few weeks.  
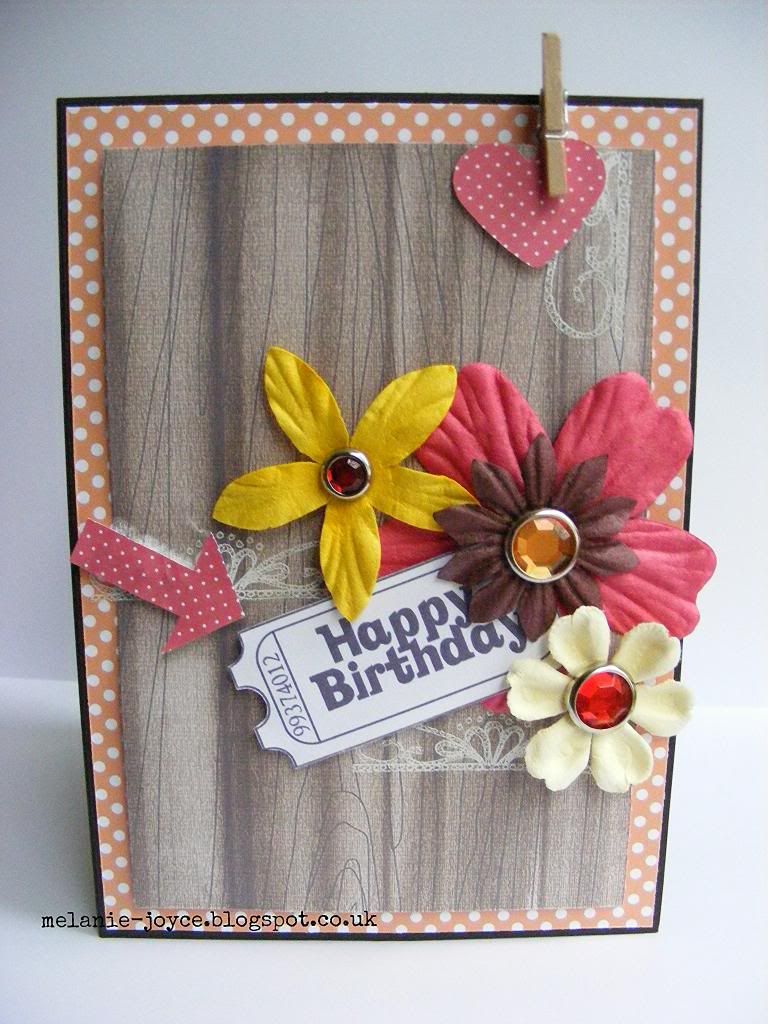
Somehow I've also been able to whip up this quick birthday card using the DIY papers and a ticket sentiment from the Polka Doodles Work and Play collection CD, with a few added bits from my stash - I'm having a bit of a mini peg revival at the moment! FYI the red spotty papers used to create the arrow and heart are actually Christmas papers taken from the brand-new CD. That's the beauty of using CDs and digital items - you have so many different designs at your disposal and you can mix and match to find the perfect item and simply print it as and when you need it. That's it for now! Thanks for looking :)
Related Posts Plugin for WordPress, Blogger...